Following the success of our first “HANA Open Mic” session (sounds cool doesn’t it?) at Just-BI initiated by Just-Glenn, we had a second round of discussions and as promised, here is another blog post touching upon table variables in stored procedures. As part of our second series of blog posts, Just-Roland has also written an interesting article about Calculating Easter and related holidays with a HANA scalar function.
Working with Table Variables in Stored Procedures
Table variables are often used as output parameters in Stored Procedures and Scripted Calculation Views. If it is just one record/row to be inserted into this table, it can be quite simple. But if multiple records need to be inserted (after some data manipulation), then this needs a slightly different approach. Roland Bouman initiated this discussion as he thought; “How difficult can this be? A simple INSERT statement should do the trick”. But he ultimately found out that an INSERT statement cannot be used on table variables. Too bad!
The below example illustrates this use-case and rather unexpectedly, running the CREATE PROCEDURE statement results in a compile-time error.
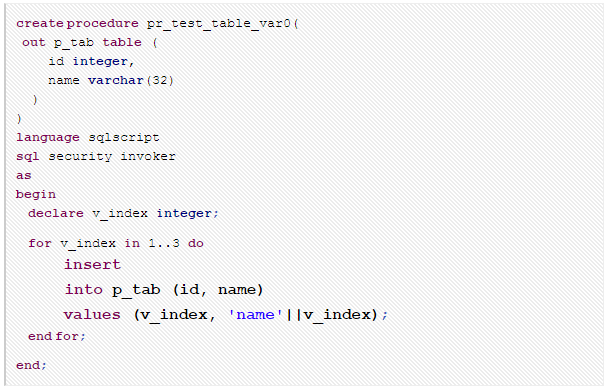
The error message stated the following:

We then discussed the options available to achieve this and figured out that there are multiple solutions to this. Here is a brief write-up about these options with examples.
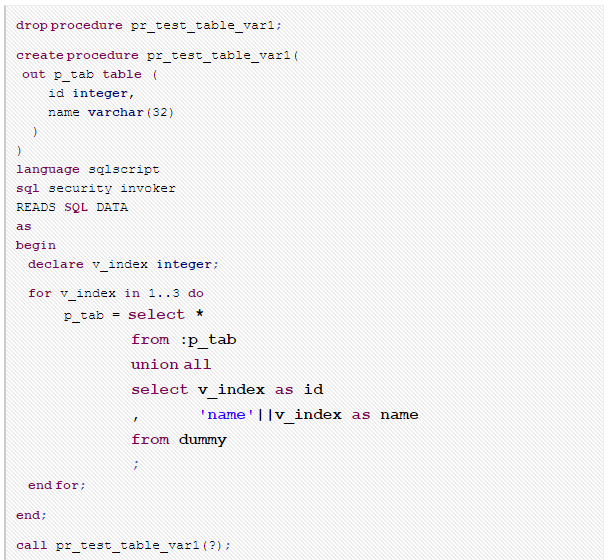
Option 1: Union All
This approach relies on assigning the result of a SELECT statement to the table variable. The SELECT statement itself uses a UNION ALL to append the required rows, to the contents of the table variable. For a newbie like me, it may also be worth mentioning that in order to SELECT the contents of a table variable, the name of the table variable must be prefixed by a colon. The drawback of this approach is repeated copying of all the contents of the table variable.
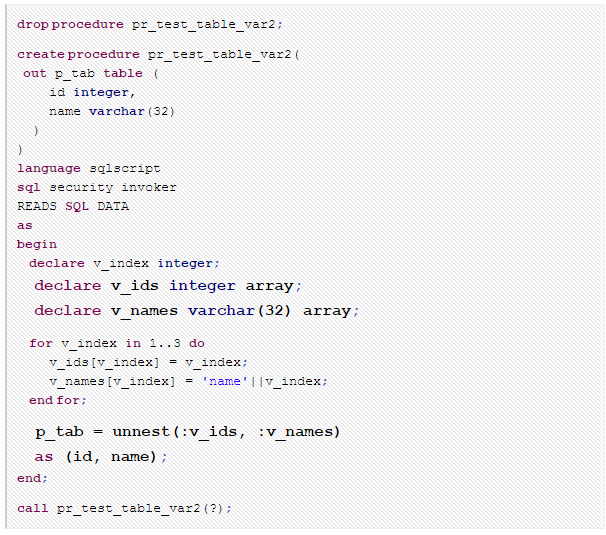
Option 2: Arrays
In this option, an array first needs to be created for each column of the table variable, fill these arrays with scalars – one for each row and then finally merging all these arrays into a table variable with UNNEST. This solution can get quite complex and tricky, and may not be the best for all requirements.
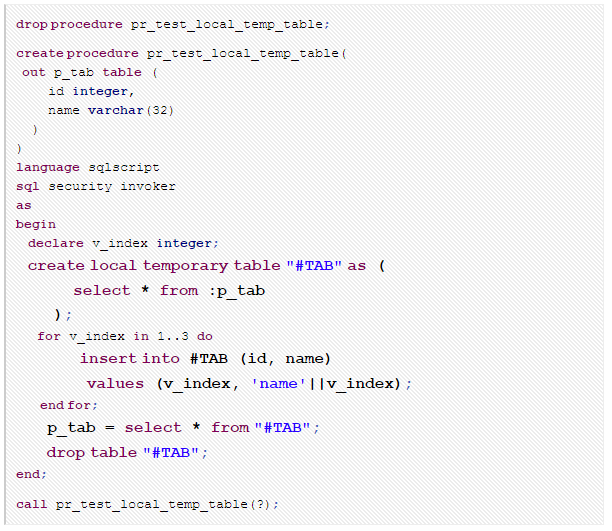
Option 3: Local Temporary Table
In this option, a local temporary table is created with the same structure as the table variable. An INSERT is allowed on temporary tables. Thus, all the data manipulation can be performed and the rows can first be inserted into a temporary table. The final result set can then be simply assigned to the table variable using a SELECT statement. I would then DROP this temporary table because if you do not, then you will be surprised to find out that you get a run-time error if the table already exists. Another syntax worth noting here is that a local temporary table name should always start with a ‘#’.
Notice that the “UNION ALL” and the “Array” options are read-only. So in that sense, the “Local temporary table” solution has the disadvantage in that it cannot be read-only.
To summarize, option 3 seems to be an efficient and easy way of working with table variables.This is an approach we would follow even with ABAP. For example, I could correlate this option to an ABAP function module, wherein an internal table is defined, data is manipulated/derived and stored in this internal table and ultimately, this internal table is assigned to the export parameter of the function module.
That’s all for now about table variables. Hope you enjoyed this post. Do watch out for more by tracking the hanatipsandtricks tag.
N.B.Thanks to Anisha Lobo for this contribution.