Before Lumira Designer GA, the Conditional Formatting feature in Design Studio was limited to displaying formatting rules from BW data source that are:
- Defined in the BEx query by Exceptions
- Defined in Analysis for Excel by Formatting rules (Smart copying)
Both solutions required IT involvement and corresponding lead-times. Now with Lumira 2.0, this feature is enhanced such that end-users can create and manage the formatting rules themselves instantly and it works for both BW- and HANA data sources!

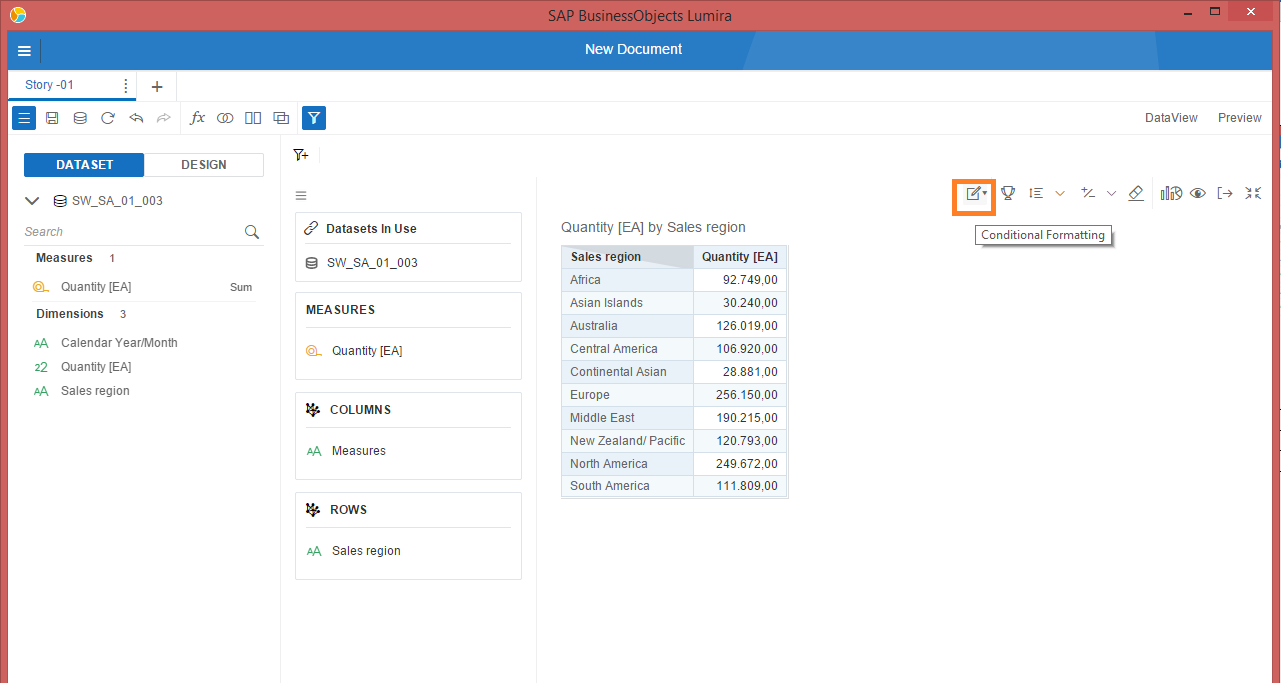
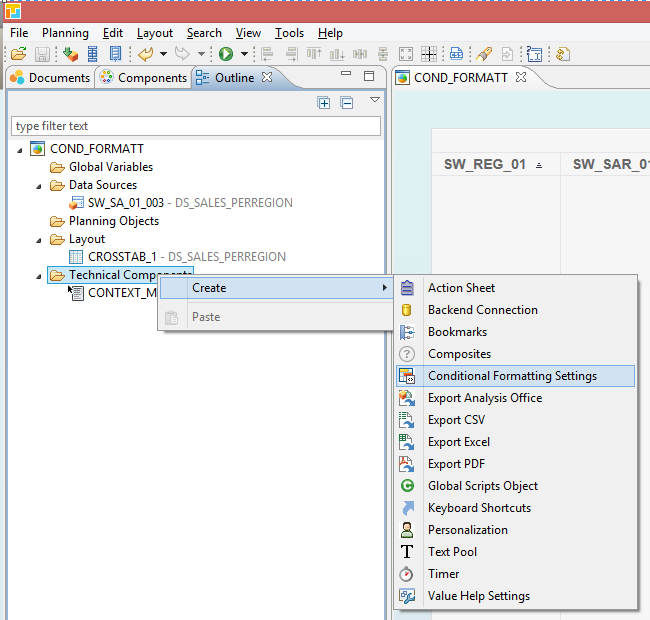
Figure 1. Conditional Formatting in the Context menu of the Crosstab in runtime!
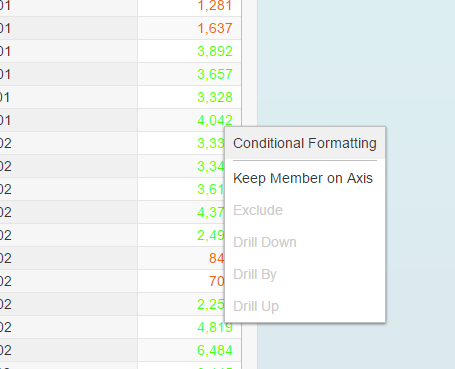
Conditional Formatting in the Context menu of the Crosstab in runtime!
It works- and looks the same as in Lumira Discovery and is just one example of “Interoperability”, a term that SAP nowadays uses to tout Lumira 2.0. For those who worked with Lumira Desktop before, this feature should look familiar as it is identical. With Lumira 2.0, we have the following options to implement Conditional Formatting in Lumira Designer:
- “Copy-Paste” from Lumira Discovery: let the end-user define the formatting rules and copy-paste these into Lumira Designer during enhancement to enterprise applications.
- Directly in Lumira Designer: implement the formatting rules directly in Designer.
The first option make sense if different personas are involved in the design- and build process. Otherwise the second option is the one to go with. Either way, both options are described below for you to choose from.
Implement Conditional Formatting by “Copy-Paste” from Discovery.
The steps described are not limited to the Crosstab as the same instructions apply for the Chart component.
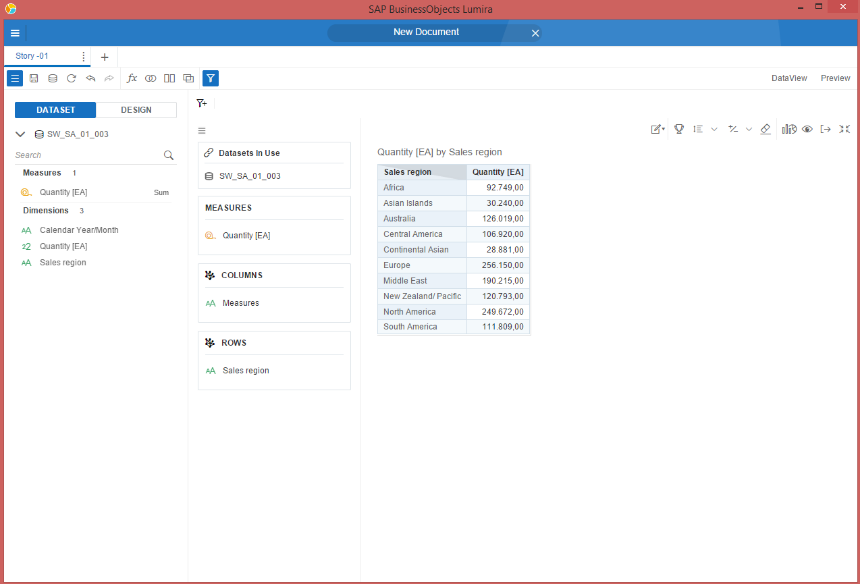
| Step 1
Create a crosstab and data source to go with. Assign the Crosstab as you normally would. |
  |
| Step 2
Open the Conditional Formatting rules |
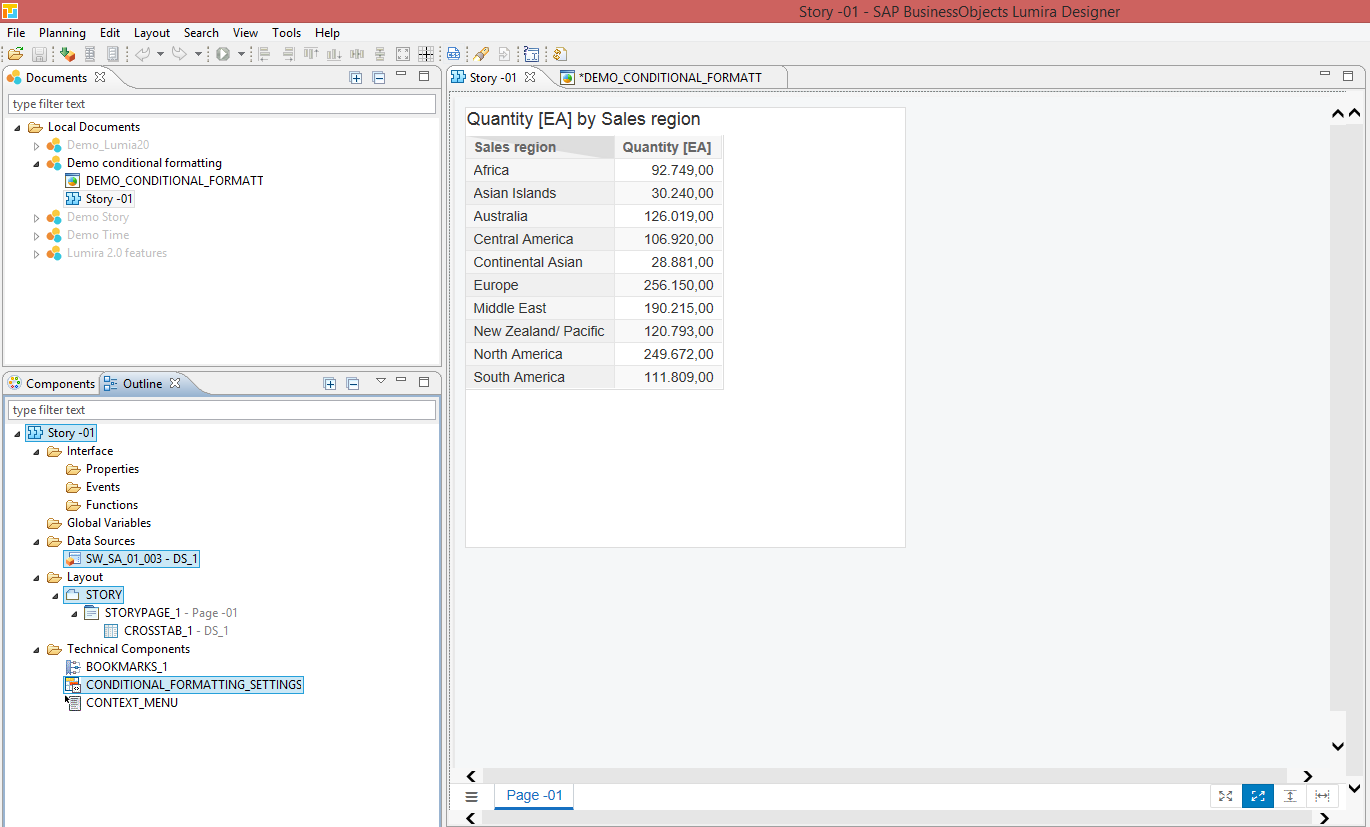
Conditional Formatting option on the canvas
Conditional formatting option when the visualization has been maximized
|
| Step 3
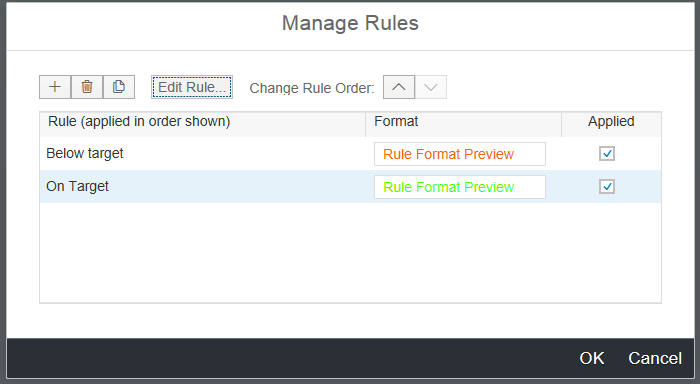
Now we have all the components to start implementing conditional formatting.
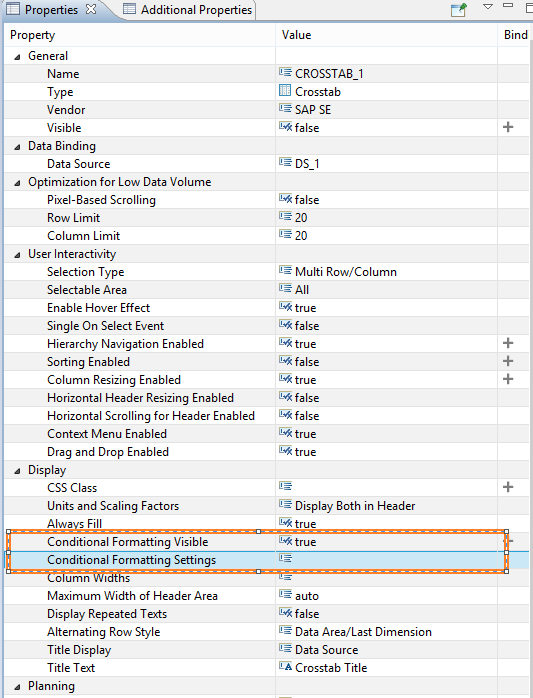
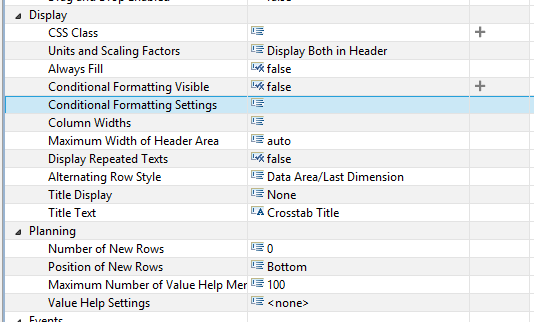
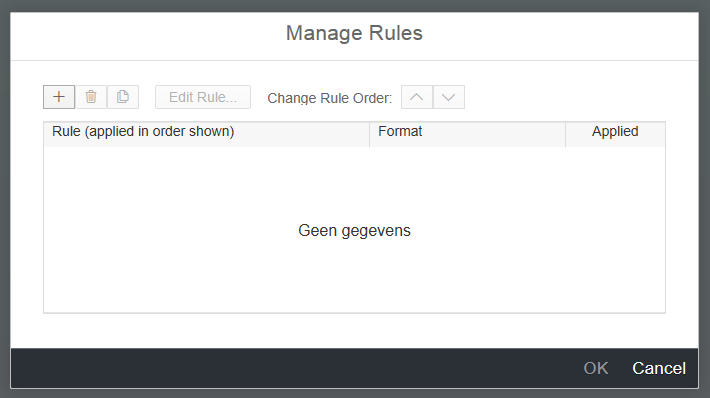
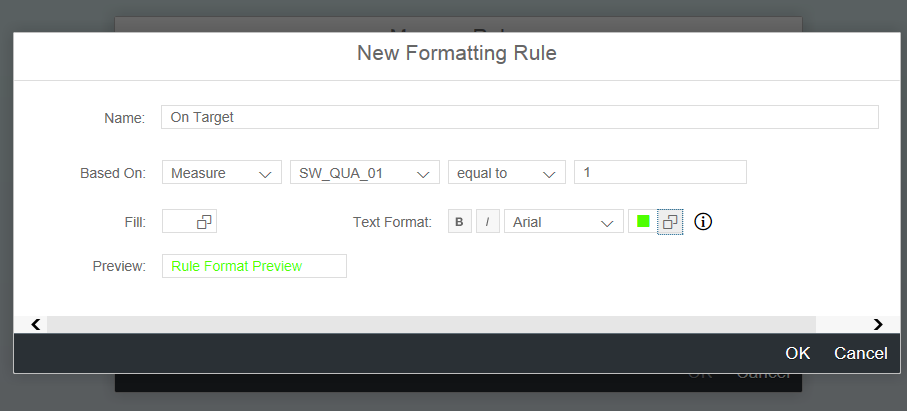
We can now define the formatting rules in a new introduced property “Conditional Formatting Settings” in the properties view of the Crosstab:
Note that the rules need to be checked if the formatting rules need to be applied at start up. Else, these can be unchecked in design time and can be checked during runtime by the end user. |
|
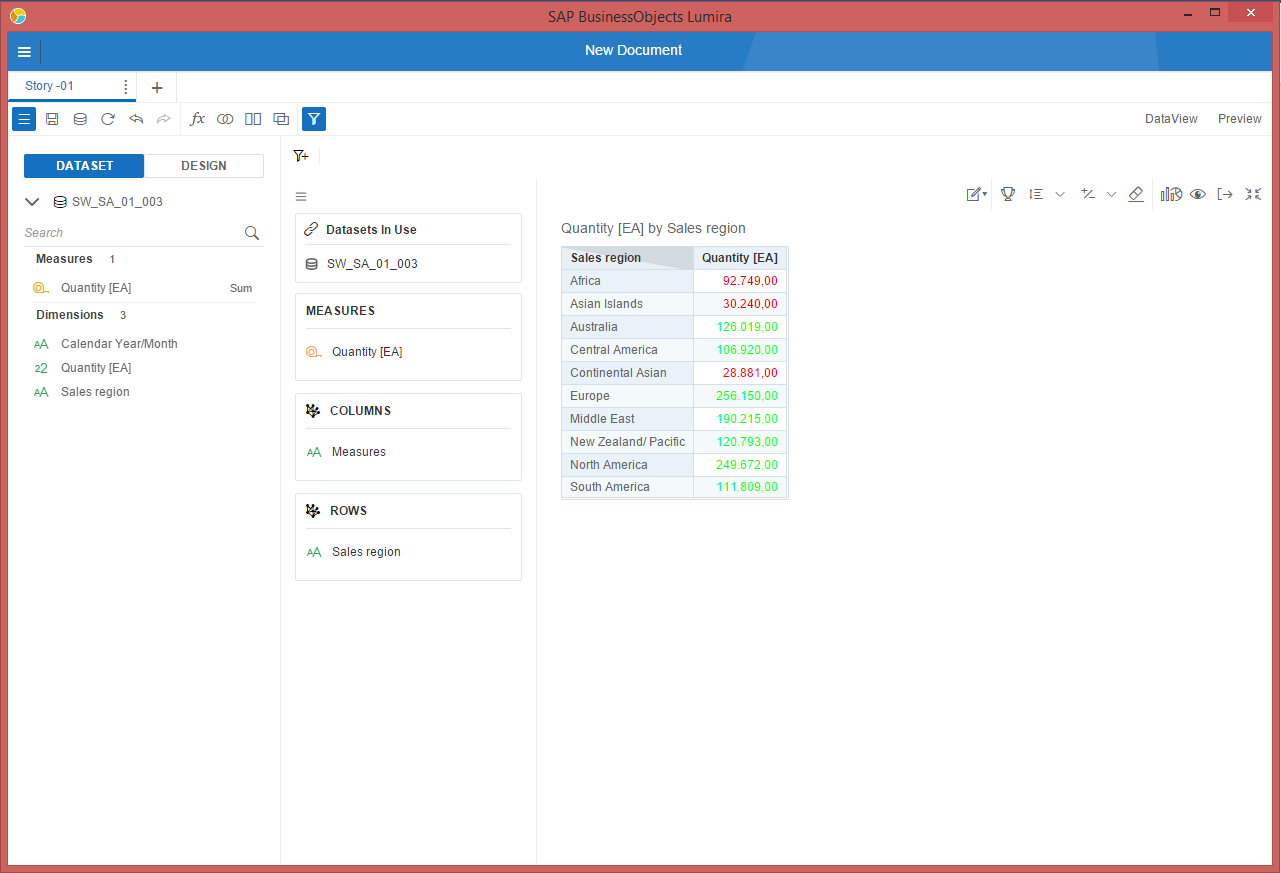
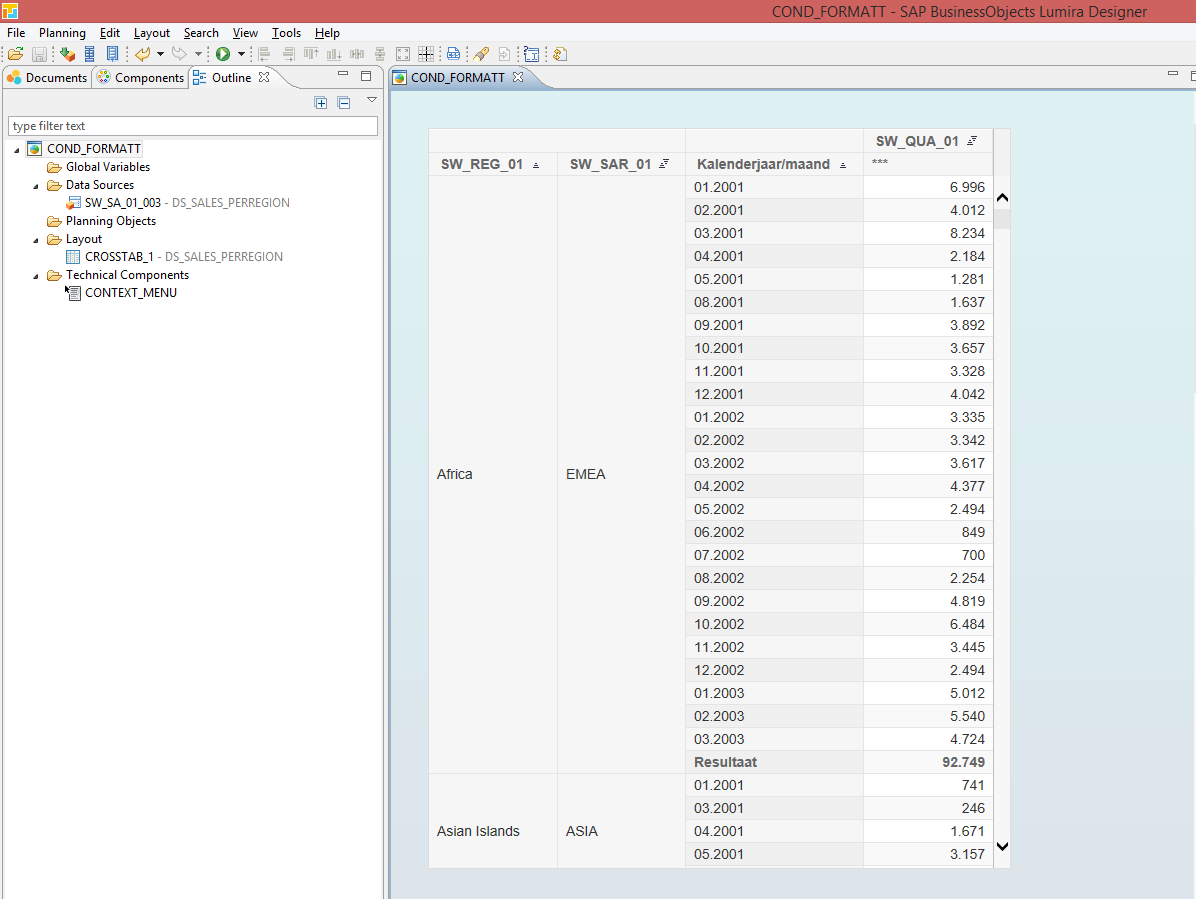
| Intermediate result
now the formatting rules are applied on the crosstab. |
  |
| Step 4
Open the Story in Designer and copy all the required components from the story to a newly created Application. |

|
| Result
The visibility and settings can be edited In the Crosstab’s Properties view. |

|


Implement Conditional Formatting directly in Lumira Designer
The steps described are not limited to the Crosstab as the same instructions apply for the Chart component.
| Step 1 Create a crosstab and data source to go with. Assign the data source to the crosstab as you normally would. |
  |
| Step 2
In order to be able to define the formatting rules in design- and run time, a new Technical component must be added to the application. For this, create a Technical Component and select “Conditional Formatting Settings” in the context menu. |
  |
| Step 3
Now we have all the components to start implementing conditional formatting. We can now define the formatting rules in a new introduced property “Conditional Formatting Settings” in the properties view of the Crosstab:
Note that the rules need to be checked if the formatting rules need to be applied at start up. Else, these can be unchecked in design time and can be checked during runtime by the end user. |
|
| Result |   |


Summary
One must still “hardcode” the threshold value though. This means that a measure can only be compared to this threshold value (manual input) and cannot be compared with a second measure e.g. target measure (sourced from a data source). The feature as described here is not on the roadmap as far as I am aware, so let’s hope this gets on the radar of SAP soon.
Still, the new conditional formatting feature is a welcome addition to the existing options. Foremost, this feature is end-user oriented and therefore really improves the user experience of Lumira Designer Applications. The user simply can access the formatting editor via the Context menu or via a separate control component if the corresponding script ”CONDITIONAL_FORMATTING_SETTINGS.openRulesDialog();” has been implemented. The fact that the end-user can create and maintain their own formatting rules means a lot of time is saved when the formatting rules need to be updated in the future.
This article belongs to
Tags
- SAP Design Studio
- SAP Lumira
Author
- Jason Lee